
Prioritising patient appointments and managing appointment attendance is a juggling act for many practices. Bp Premier has a multitude of tools to help increase your appointment book efficiency.
With numerous patients to schedule and limited time available, effectively managing appointments becomes crucial for providing quality care. In this article, we will explore various tools and strategies that can enhance your practice’s appointment management system, allowing you to streamline processes, improve patient satisfaction, and optimise overall efficiency.
Bp Comms - Schedule Appointment Reminders
Automate sending appointment reminders by setting up a Schedule on the Bp Premier server.
- Select Setup > Configuration > Bp Service.
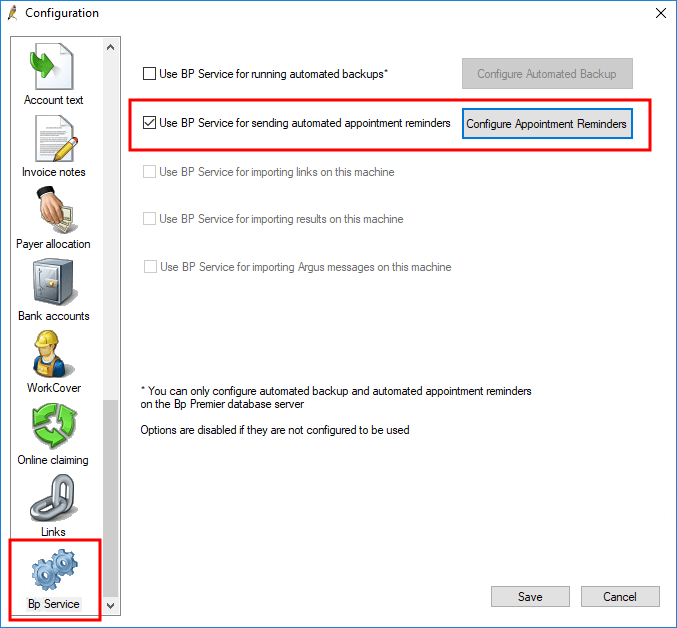
2. Tick Use Bp Service for sending automated appointment reminders and click Configure Appointment Reminders. Click Add.
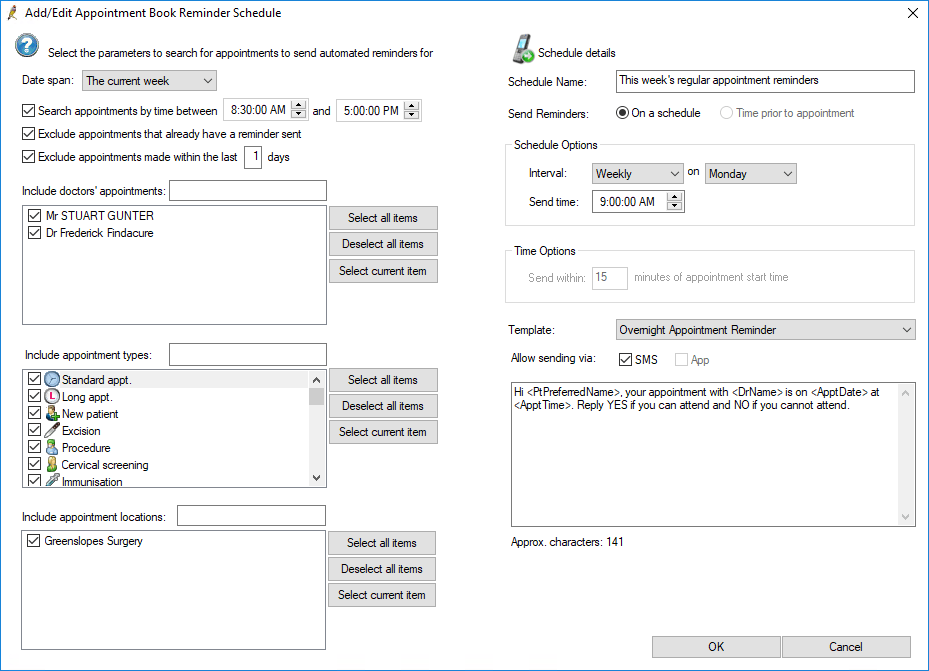
3. In the example above, reminders will be sent out at 9 am each Monday using the Overnight Appointment reminder template for appointments in the current week for two providers for all appointment types at the Greenslopes Clinic.
Bp Comms – Update Appointment Status Automatically
You can configure the system to check and update the appointment status based on replies received.
1. From the main screen, select Setup > Configuration > Appt Reminders tab.
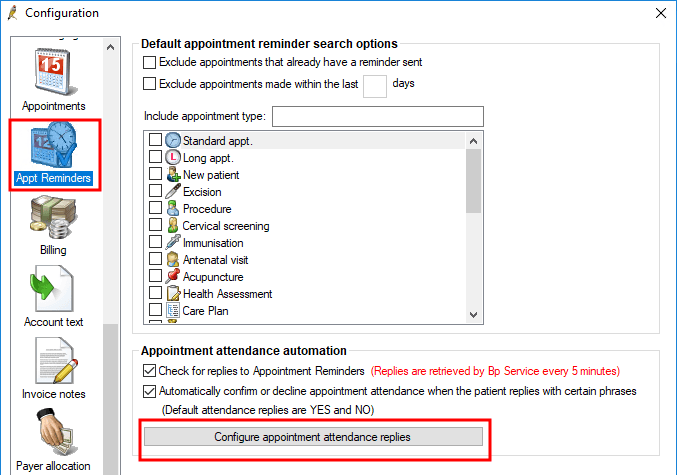
2. Both checkboxes under Appointment attendance automation must be ticked to enable appointment updates by SMS reply. Click Configure appointment attendance replies to open the Automatic Confirmation Options window.
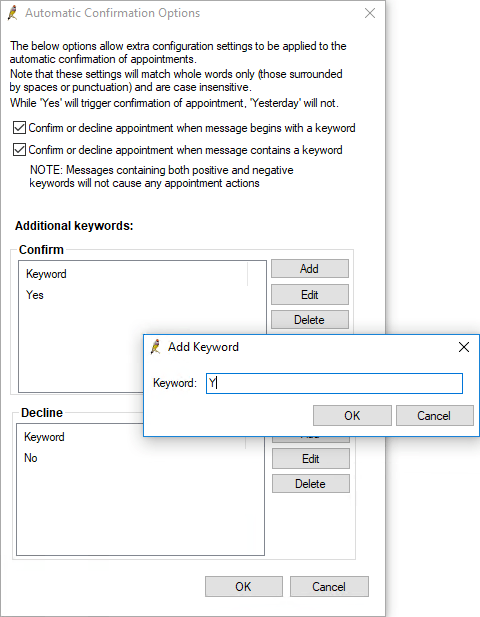
3. Click Add next to the Confirm or Decline list of keywords. Keywords are only accepted as an exact match of whole words. Click Ok to save.
Bp Comms - Check Appointment Reminder Replies
While checking for replies to Bp Comms appointment reminders, you can cancel, move, edit, or change the status of related appointments.
1. From the appointment book, select Utilities > Check Appointment Reminder Replies.
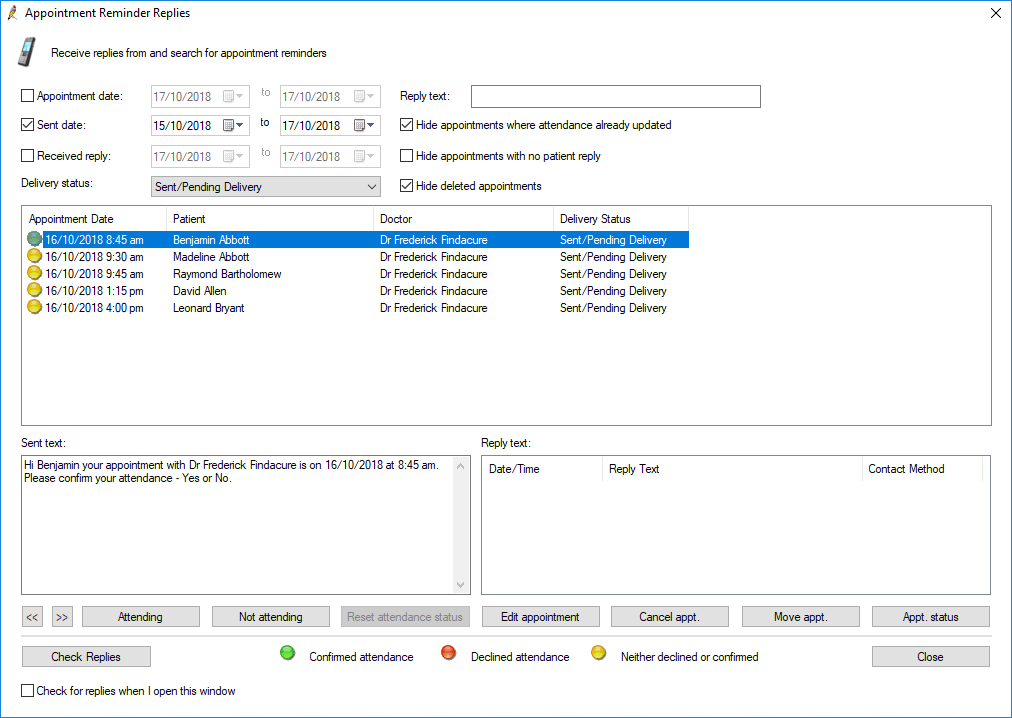
2. Search for replies using the fields at the top left and filter the appointments shown using the checkboxes at the top right. The middle section of the screen shows the appointment reminders that have been sent and the status. Select a message to see the sent text of the reminder and the reply text, if any. Utilities > Check Appointment Reminder Replies.
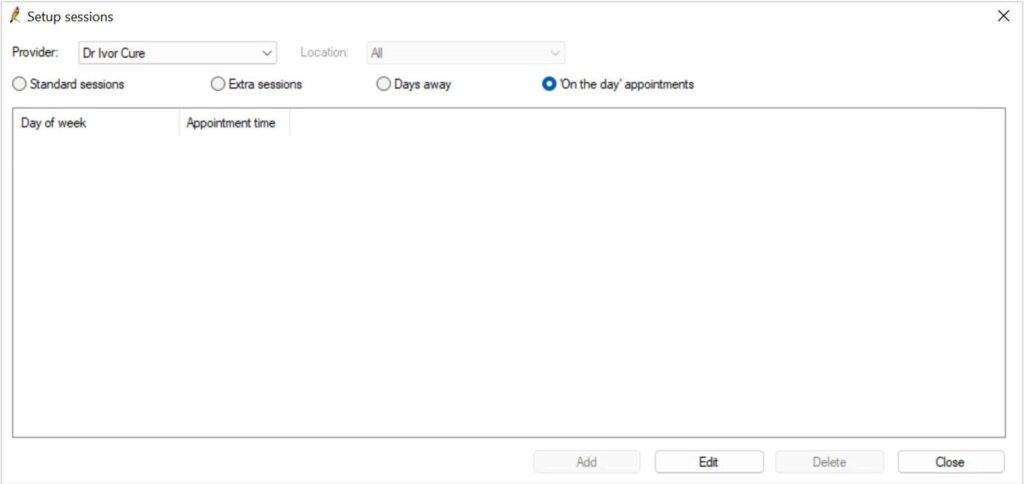
On The Day Appointments
As part of the Sessions setup, there is an option to schedule recurring On The Day Appointments for either the whole practice or per provider.
1. From the Main Screen, click Setup > Sessions. Make a selection from the Provider dropdown > click the On the day appointments radio checkbox > click Edit.
2. Select the Day of week from the dropdown and simply check each appointment slot that you would like to mark as an On The Day Appointment. Click Save and repeat the process to add more days and more appointments.
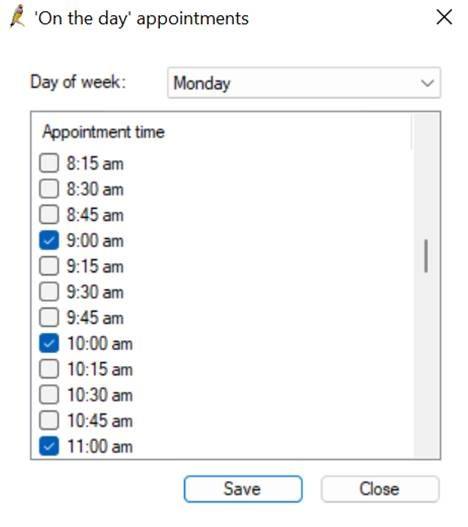
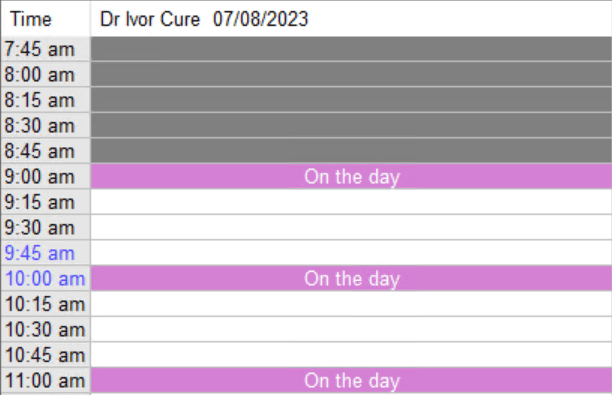
3. These slots will be seen in the appointment book on future days as On the Day and coloured pink. Once the day starts, the placeholders will revert to available appointment slots ready for booking. Note: only users with the Override On the day appointments permission level can book these appointments before the day.
Non-Patient Appointment Placeholders
1. When booking an appointment, there are multiple non-patient appointment types available to choose from. Leave the Search for field blank > select Other in the appointment type > Enter the appointment information into the Details field – the details will appear in the appointment book > Click on the Book Appointment button as usual.
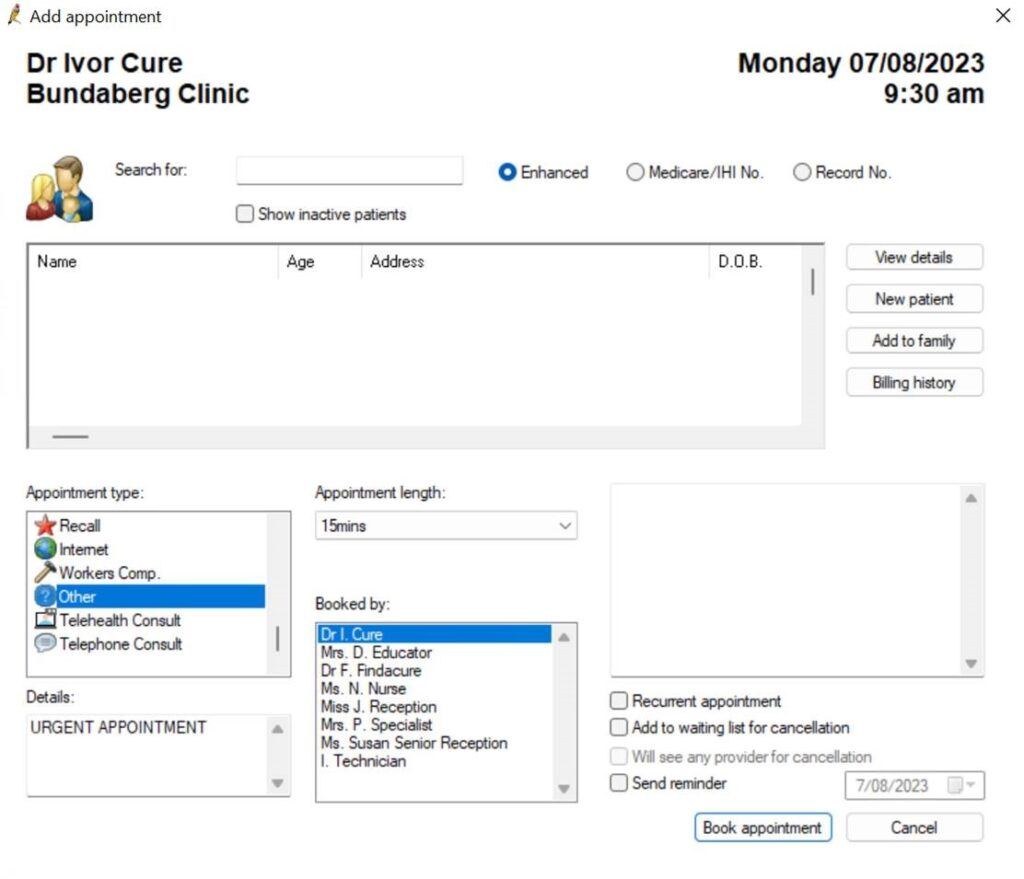
2. This appointment type will act like usual and must either be double booked with a patient appointment or cancelled when needed.
Waiting List for Cancellation
Patients with or without an existing appointment can be added to the cancellation list. To ensure the cancellation list automatically appears whenever an appointment is cancelled, from the Main Screen, Select Setup > Configuration > Appointments > Tick Show Cancellation list when an appointment is cancelled checkbox > Click Save.
1. From the appointment book, select View > Waiting list for cancellations. Click Add to cancellation list.
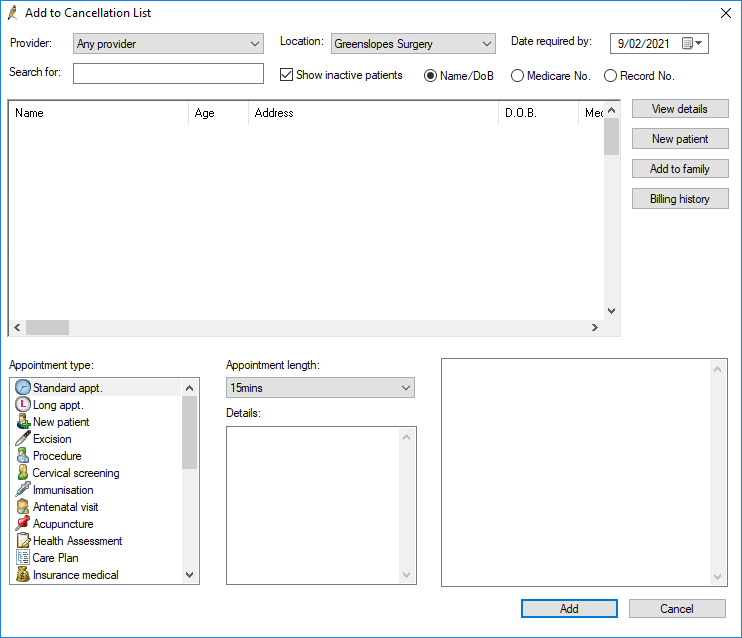
2. Fill in the cancellation list item details – this screen has similar fields to the Add Appointment screen. Ensure you select the date the patient needs the appointment from the Date required by: field. The cancellation list item will expire at the end of the day selected. Click Add.
3. Note: Use the Details section to add extra information or annotate a triage priority level.
Optimising patient appointment scheduling and attendance is vital for running a smooth and efficient medical practice. By utilising the tools available within Bp Premier, you can streamline your appointment book, reduce no-shows, and enhance patient satisfaction. We encourage you to visit our comprehensive knowledge base for more in-depth information and practical guidance. Together, let’s revolutionise your appointment management system and provide exceptional care to your patients.
Authored by:
![]()
Nicole Findlay
Training & Deployment Specialist at Best Practice Software
Explore our range of news and training resources:
Bp Learning Video Library | Bp Learning Training Options | Bp Newsroom Blog
Subscribe to Our Newsletters | Bp Learning Webinars