Our Bp VIP.net Training and Deployment Specialist, Johanna Monson, has five handy tips and tricks to share with you to help you become more efficient using Bp VIP.net.
1. The Email Search
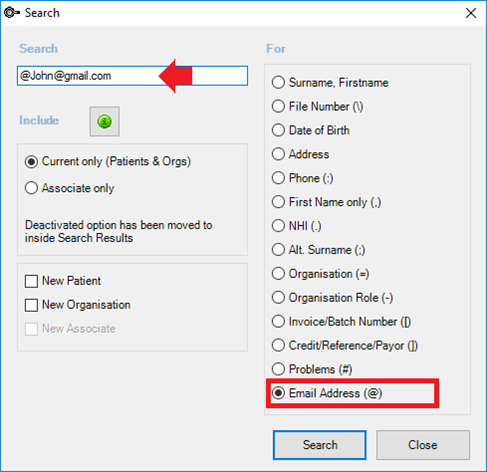
Our first tip looks at using the new, convenient email search functionality that was made available in the Bp VIP.net Topaz release. The Email Search lets you quickly link emails in your Inbox to the corresponding patient in Bp VIP.net. Type the @ symbol before the email address to quickly activate the email search function or select the Email Address (@) radio button.

2. Using the Window Menu
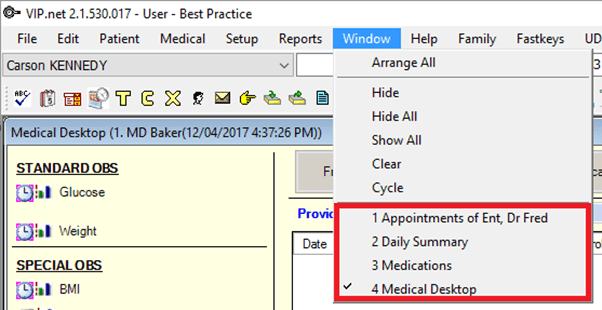
Did you know that the Window menu drop-down lets you see all the screens you currently have open in Bp VIP.net?
The ticked screen title identifies which screen you currently have in focus, and you can select another open screen by clicking on the various titles listed. This is particularly handy if you have accidentally clicked outside of the Bp VIP.net screen and lose the screen that you were working on. Simply click on the screen title you need and resume your task.

3. Advanced Formatting Tools
The formatting of Templates in Bp VIP.net can be enhanced by using your right-click on the Template screen. When you right-click at the top or bottom of a template, you will get an advanced option to set up Margins and Paper, Headers and Footers, and Columns and Borders.
When you right-click in the template’s body, you will see the advanced option to set Paragraph-Formatting and Indents, and Frame and Page Breaks.
The pagination settings are similar to the tools that you would be familiar with using in Microsoft Word and are handy in ensuring your letters are well formatted over multiple pages.
When you right-click within a table, you can open the Table Properties to change cell margins, borders, cell colours, and alignment.
When creating new templates, it’s advantageous to keep the formatting symbol turned on to make your current formatting visible. This conveniently identifies any hidden extra spaces, font size variations, line breaks, and other pesky hidden formatting that may be wreaking havoc in your template.
4. Accessing MIMS
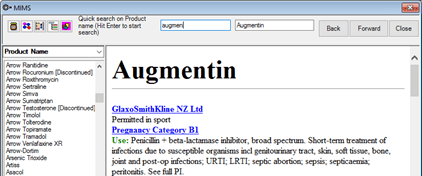
Have you ever wanted to check the MIMS database in Bp VIP.net without starting the prescribing process? Clinical users can click the Help menu, then MIMS to open and view the MIMS database.

5. Faster Prescribing in Bp VIP.net
When creating a script for a commonly prescribed medication in Bp VIP.net, the Save button at the top of the details section allows you to save the directions included in the orange section of the Prescription Item Details. This feature will save your clinicians time when prescribing a regular medication as they can conveniently select from the saved default.
Likewise, you can create a prescription, complete the directions, and enter the first dose. Then, click save in the Saved Default section, alter the Dose and click Save again. You will now have all the regular doses for the selected medication pre-saved.

The saved default list can also be deleted in the clinician’s Provider Screen. Select Setup, then Internal Providers, select the provider record and click on the Internal tab. Click the Doses button to manage the list of the provider’s pre-saved doses.
If you have one provider you prefer to maintain the list of saved Doses, other providers can access their list by entering the provider’s name in the Use Dose Entries From field.
For more tips and tricks, check out our recent Be In The Know webinar recording covering Advanced Prescribing in Bp VIP.net. Now accessible from the Knowledge Base!
Explore our range of news and training resources:
Bp Learning Video Library | Bp Learning Training Options | Bp Newsroom Blog
Subscribe to Our Newsletters | Bp Learning Webinars

